
The ability to install WordPress on Laragon is essential for developers, designers, and anyone who enjoys experimenting with WordPress. Laragon is a robust, portable, and lightning-fast Windows local development environment. With only a few clicks, you can set up WordPress locally without the need for complicated configurations!
In this guide, I’ll walk you through a beginner-friendly, step-by-step process to install WordPress on Laragon. Whether you’re building your next website or testing out themes and plugins, this setup will save you tons of time.
Why Use Laragon for WordPress Local Development?
Before we dive into the installation steps, let’s quickly go over why Laragon is a favorite among developers:
- Blazing fast – Super lightweight and efficient.
- Portable – You can install and run it from a USB drive.
- Smart features – Auto virtual hosts, pretty URLs, and automatic SSL.
- Pre-built tools – Comes with Apache, MySQL/MariaDB, PHP, and more.
- One-click WordPress installation – Seriously, it’s that easy.
Step-by-Step Guide to Install WordPress on Laragon
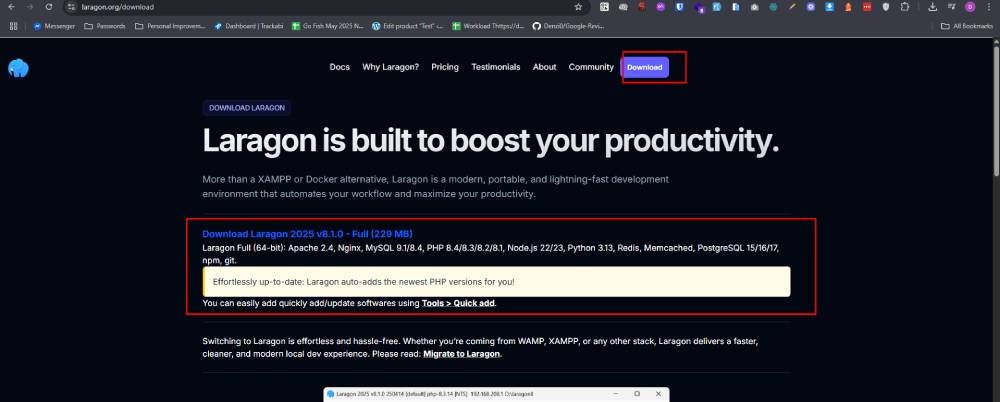
Step 1: Download and Install Laragon
- Go to the official Laragon website.
- Download the Laragon Full version (includes Apache, MySQL/MariaDB, PHP, etc.).
- Run the installer and follow the on-screen instructions.
- Choose your preferred installation folder (default is usually
C:\laragon). - Once installed, launch Laragon.
Tip: When prompted, allow Laragon through your firewall so it can run services like Apache and MySQL.
Step 2: Start Laragon and Configure Environment
- Open Laragon.
- Click on “Start All” to run Apache and MySQL services.
- Once running, you’ll see green indicators showing everything is active.
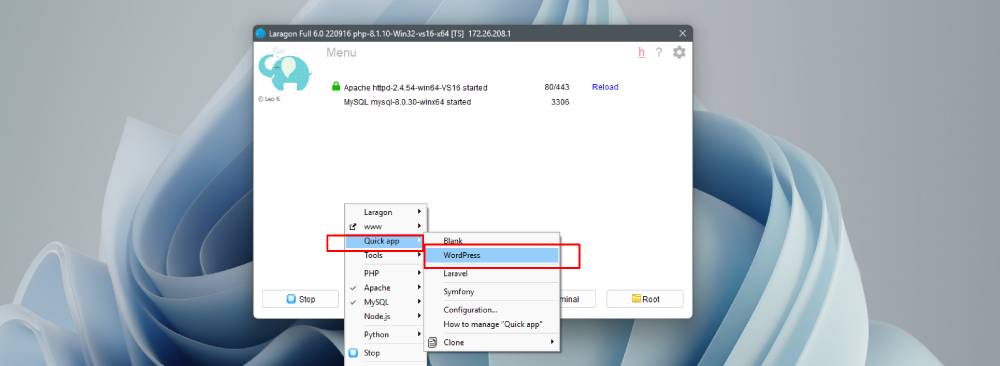
Step 3: Quick app WordPress Installation
Here’s where Laragon shines:
- Go to the Laragon app
- Right-click inside the app and choose “Quick app > WordPress”.
- Enter a name for your project, e.g.,
myblog. - Laragon will automatically download the latest WordPress version and set it up.
That’s it! Laragon will now extract the WordPress files and configure everything.
Step 4: Access Your Local WordPress Site
- Open your browser and go to:
http://myblog.test(if using virtual hosts)- or
http://localhost/myblog(if not using virtual hosts)
- You’ll see the standard WordPress installation screen.
- Choose your language and click Continue.
- Fill in your site details (site name, username, password, email).
- Click Install WordPress.
You now have WordPress running locally on your Windows machine using Laragon!
Final Thoughts
Setting up WordPress with Laragon is fast, easy, and ideal for developers, designers, and bloggers. Unlike XAMPP or WAMP, Laragon works right out of the box — no hassle, no delays.
Next time you build or test a WordPress site, skip the hosting headaches and go local with Laragon.
